
最近在搞的一个小项目里用到了实时聊天功能,于是乎就有了这篇文。基于Springboot,和websocket实现一个在线聊天功能,理论上,下面的代码基本上就是粘贴即用。
先说功能:可以群发,可以私聊,可以发送媒体文件, 后台还会对聊天记录进行保存。这些功能点基本满足了一些简单场景下的聊天需求。
至于消息已读未读的功能后面会说一嘴,因为我这里没涉及到所以没做实现,还有离线留言,这个可以通过队列实现。
一些概念:
先通俗的讲一下websocket和http区别:想象你和你的朋友在公园玩耍。如果你们是用HTTP方式交流,那就像你们用对讲机聊天。每次你想说话,你需要按下对讲机的按钮,说完后再松开,然后轮到你的朋友按按钮回话。这样的交流虽然可以工作,但每次通话都需要你主动发起,你说完,对方才能回答。
而如果你们用WebSocket方式交流,那就像你们之间有一条直接的电话线。一旦连接建立,你和你的朋友可以随时说话,而不需要每次都挂断再重新拨号。这样就可以实时地互相聊天,不需要等待对方“接听”。
总的来说,HTTP就像是发短信或者对讲机,每次交流都是单独的,需要请求和回应;而WebSocket像是电话,一旦建立连接,信息可以随时双向流动,更适合需要实时交流的场景。
从软件软件工程师的角度来讲:
1. HTTP(超文本传输协议)
- 基于请求-响应模型: HTTP是无状态的,意味着每次请求之间是相互独立的。客户端发送一个请求给服务器,服务器处理后返回响应。每次交互都需要客户端发起。
- 连接时效性: 在传统的HTTP协议中,每个请求通常都会打开一个新的连接,请求完成后连接关闭。虽然现代HTTP/1.1支持持久连接,但通信仍然是基于离散的请求/响应模式。
- 适用场景: 适合大多数Web应用程序,如网页内容的加载、表单的提交等。因为大多数Web交互都是基于短暂的、单次的信息交换。
2. WebSocket
- 全双工通信: WebSocket提供全双工通信能力,这意味着一旦连接建立,服务器和客户端可以随时互相发送数据,无需等待对方先发起请求。
- 持久连接: WebSocket一旦打开,连接会保持活动状态直到被客户端或服务器明确关闭。这种持久性使其非常适合需要频繁和实时交互的应用。
- 适用场景: 特别适用于需要实时数据更新的应用,如在线游戏、股票交易平台、实时通讯工具等。
技术考虑
- 性能和资源利用: 虽然WebSocket可以减少重复建立连接的开销,但长时间的连接可能占用更多服务器资源。因此,在设计时需要考虑合理的资源管理和扩展性。
- 兼容性和安全性: WebSocket依赖于较新的浏览器技术,因此在老旧设备上可能存在兼容性问题。同时,保持持久连接意味着需要考虑更复杂的安全策略,如身份验证和数据加密。
接下来将开始做代码实现。
按照惯例先上环境:
spring-boot 2.3.12.RELEASE
spring-boot-starter-websocket:2.3.12.RELEASE
一、springboot核心依赖
<!-- Spring Boot Starter -->
<dependency>
    <groupId>org.springframework.boot</groupId>
    <artifactId>spring-boot-starter-web</artifactId>
</dependency>
<!-- WebSocket Dependency -->
<dependency>
    <groupId>org.springframework.boot</groupId>
    <artifactId>spring-boot-starter-websocket</artifactId>
</dependency>
二、代码实现
首先,既然是聊天,那么一定是需要一个对象作为聊天的载体,后续前后端的交互以及数据持久化都会用到。
当然这个对象一定是根据实际需求来创建的而非固定的,这里给一个例子:
/**
 * 聊天内容载体
 * @author https://lzyz.fun/
 */
@Slf4j
@Getter
@Setter
@ToString
@AllArgsConstructor
@NoArgsConstructor
public class ChatMessage implements Serializable {

    private Long chatId;               // 对话ID
    private String content;            // 发送内容
    private Integer senderId;          // 发送者ID
    private Integer receiverId;        // 接受者ID
    private Integer[] recipientIds;;   // 用于指定多个接收者的情况
    private String resourcePath;       // 单条消息中存在媒体文件,则将媒体文件存放地址附进去
    private Integer readStatus;        // 状态。 已读,未读,撤回

    @JsonFormat(pattern = "yyyy-MM-dd HH:mm:ss", timezone = "GMT+8")
    private LocalDateTime time;

    public ChatMessage(Integer senderId, String content){
        this.senderId = senderId;
        this.content = content;
        this.time = LocalDateTime.now();
    }

    public ChatMessage(Integer senderId, String content, Integer receiverId ){
        this.senderId = senderId;
        this.content = content;
        this.receiverId = receiverId;
        this.time = LocalDateTime.now();
    }
}然后是websocket的配置类,用来配置websocket的Endpoint,我们会自己实现一个SocketServer
/**
 * WebSocketConfig
 * @author https://lzyz.fun/
 */
@Configuration
public class WebSocketConfig implements WebSocketMessageBrokerConfigurer {

    /**
     * 注入ServerEndpointExporter,
     * 这个bean会自动注册使用了@ServerEndpoint注解声明的Websocket endpoint
     */
    @Bean
    public ServerEndpointExporter serverEndpointExporter() {
        return new ServerEndpointExporter();
    }

    @Override
    public void configureWebSocketTransport(WebSocketTransportRegistration registry) {
        registry.setMessageSizeLimit(8192) //设置消息字节数大小
                .setSendBufferSizeLimit(8192)//设置消息缓存大小
                .setSendTimeLimit(10000); //设置消息发送时间限制毫秒
    }
}实现一个SocketServer
/**
 * @ServerEndpoint 注解是一个类层次的注解,它的功能主要是将目前的类定义成一个websocket服务器端<br>
 * 注解的值将被用于监听用户连接的终端访问URL地址<br>
 * 客户端可以通过这个URL来连接到WebSocket服务器端
 * @author https://lzyz.fun/
 */
@Slf4j
@Component
@ServerEndpoint("/websocket/{userId}")
public class WebSocketServer {

    /**
     * 线程安全的静态变量,用来记录当前在线连接数。
     */
    private static final AtomicInteger onlineNum = new AtomicInteger();

    /**
     *  所有在线用户
     *  线程安全Set。用来存放每个用户对应的WebSocketServer对象。
     */
    @Getter
    private static final ConcurrentHashMap<Integer, Session> sessionPools = new ConcurrentHashMap<>();


    /**
     * 发送消息
     * @param session session
     * @param message message
     * @throws IOException e
     */
    public void sendChatMessage(Session session, String message) throws IOException {
        synchronized (session) {
            session.getBasicRemote().sendText(message);
        }
    }

    /**
     * 给指定用户发送信息
     * @param userId userName
     * @param message message
     */
    public void sendInfo(Integer userId, ChatMessage message){
        String josnStr = JSONUtil.toJsonStr(message);

        Session session = sessionPools.get(userId);
        if(session == null) {
            message.setContent("【系统通知】对方目前离线,无法实时收到您的消息。");
            message.setReceiverId(message.getSenderId());
            message.setTime(LocalDateTime.now());
            josnStr = JSONUtil.toJsonStr(message);
            session = sessionPools.get(message.getSenderId());
        }

        try {
            sendChatMessage(session, josnStr);
        }catch (Exception e){
            log.error("发送消息失败:", e);
        }
    }

    /**
     * 群发消息
     * @param message message
     */
    public void broadcast(String message){
        for (Session session: sessionPools.values()) {
            try {
                sendChatMessage(session, message);
            } catch(Exception e){
                log.error("群发异常:{}", e.getMessage());
            }
        }
    }

    /**
     * 建立连接成功调用
     * @param session session
     * @param userId userName
     */
    @OnOpen
    public void onOpen(Session session, @PathParam(value = "userId") Integer userId){
        Session oldSession = sessionPools.get(userId);
        if(oldSession == null) {
            sessionPools.put(userId, session);

            log.info(userId + "加入webSocket!当前人数为" + sessionPools.size());

            // 广播上线消息
//            ChatMessage msg = new ChatMessage(
//                    0,
//                    "id=" + userId + "加入webSocket!当前人数为" + sessionPools.size(),
//                    -999
//            );
//            broadcast(JSONUtil.toJsonStr(msg));
        }else{
            log.info(userId+"已登录");
        }

    }

    //关闭连接时调用
    @OnClose
    public void onClose(@PathParam(value = "userId") Integer userId){
        sessionPools.remove(userId);

        log.info(userId + "断开webSocket连接!当前人数为" + sessionPools.size());

        // 广播下线消息
//        ChatMessage msg = new ChatMessage(
//                0,
//                "id=" + userId + ",断开webSocket连接!当前人数为" + sessionPools.size(),
//                -999
//        );
//        broadcast(JSONUtil.toJsonStr(msg));
    }


    /**
     * 收到客户端信息后,根据接收人的username把消息推下去或者群发
     *  to=-1群发消息
     * @param message message
     * @throws IOException
     */
    @OnMessage
    public void onMessage(String message) throws IOException{
        ChatMessage msg = JSONUtil.toBean(message, ChatMessage.class);
        msg.setTime(LocalDateTime.now());

        // 接受者为-999为群发, 否则单发
        if (msg.getReceiverId().equals(-999)) {
            broadcast(JSONUtil.toJsonStr(msg));
        } else {
            sendInfo(msg.getReceiverId() ,msg);
        }
    }

    /**
     * 错误时调用
     * @param session  session
     * @param throwable throwable
     */
    @OnError
    public void onError(Session session, Throwable throwable){
        log.error("发生错误");
        throwable.getCause().printStackTrace();
    }

    /**
     * 在线数 + 1
     */
    public static void addOnlineCount(){
        onlineNum.incrementAndGet();
    }

    /**
     * 在线数 - 1
     */
    public static void subOnlineCount() {
        onlineNum.decrementAndGet();
    }
}
其实到这里,一个基本的聊天功能就已经完成了。。
三、测试和演示
为了测试一下,下面的HTML代码提供了一个简易的聊天Demo:
<!DOCTYPE html>
<html lang="CN">
<meta charset="UTF-8">
<head>
    <title>Simple Chat Application</title>
    <script src="https://cdn.jsdelivr.net/npm/sockjs-client/dist/sockjs.min.js"></script>
    <script src="https://cdn.jsdelivr.net/npm/stompjs/lib/stomp.min.js"></script>
    <style>
        #messageArea {
            margin-top: 20px;
            height: 200px;
            overflow-y: scroll;
            border: 1px solid #cccccc;
            padding: 5px;
        }
        #messageInput, #userId, #privateMessageInput, #receiverId {
            width: 300px;
        }
    </style>
</head>
<body>
<p>测试websocket <span id="user-my"></span> </p>

<div>
    <input type="text" id="userId" placeholder="输入登录ID"/>
    <button id="connectBtn" onclick="connect()">连接websocket</button>
    <button id="closeBtn" disabled  onclick="disconnect()">断开连接</button>
</div>
</br>
<div>
    <input type="text" id="receiverId" placeholder="输入对方ID"/>
    <input type="text" id="privateMessageInput" placeholder="输入私信内容"/>
    <button onclick="sendPrivateMessage()">发送私信</button>
</div>
</br>
<div>
    <input type="text" id="messageInput" placeholder="输入广播消息..."/>
    <button onclick="sendPublicMessage()">发送广播消息</button>
</div>

<ul id="messageArea"></ul>

<script type="text/javascript">


    var socket = null;
    function connect() {
        var userID = document.getElementById('userId').value;
        var connectBtn = document.getElementById('connectBtn');
        var closeBtn = document.getElementById('closeBtn');
        var idIpt = document.getElementById('userId');
        connectBtn.disabled = true;
        closeBtn.disabled = false;
        idIpt.disabled = true;
        document.getElementById('user-my').innerHTML = `[当前登录id为:  <strong>${userID}</strong></>]`;


        socket = new WebSocket("ws://localhost:9988/websocket/" + userID);
        socket.onmessage = function(event) {
            var data = JSON.parse(event.data);
            console.log(data);
            // 普通消息,接收服务端的实时消息并添加到HTML页面中
            showMessage(data, false)
        };

    }

    function disconnect() {
        if (socket !== null) {
            socket.close();
            console.log("断开连接");
            var closeBtn = document.getElementById('closeBtn');
            closeBtn.disabled = true;
            var connectBtn = document.getElementById('connectBtn');
            connectBtn.disabled = false;
            var idIpt = document.getElementById('userId');
            idIpt.disabled = false;
        }
    }

    function sendPublicMessage() {
        var messageContent = document.getElementById('messageInput').value;
        if(messageContent && socket) {
            var chatMessage = {
                senderId: document.getElementById('userId').value,
                receiverId: -999,
                content: messageContent
            };
            socket.send(JSON.stringify(chatMessage));
            document.getElementById('messageInput').value = '';
        }
    }

    function sendPrivateMessage() {
        var inputId = document.getElementById('receiverId').value;
        var messageContent = document.getElementById('privateMessageInput').value;

        if(messageContent && socket && inputId) {
            var chatMessage = {
                senderId: document.getElementById('userId').value,
                resourcePath: '/opt/aaaaa.png',
                receiverId: inputId,
                content: messageContent
            };
            console.log("准备给后端:", chatMessage);
            socket.send(JSON.stringify(chatMessage));
            showMessage(chatMessage, true)
            // document.getElementById('privateMessageInput').value = '';
        }
    }

    function showMessage(message, isMe) {
        console.log(message);
        var messageElement = document.createElement('li');
        let text = isMe === true ? `我` : "["+message.time+"] " + message.senderId ;
        messageElement.innerText =  `${text}: ${message.content}`;
        document.getElementById('messageArea').appendChild(messageElement);

        var div = document.getElementById('messageArea');
        div.scrollTop = div.scrollHeight;

    }
</script>
</body>
</html>
长这样:
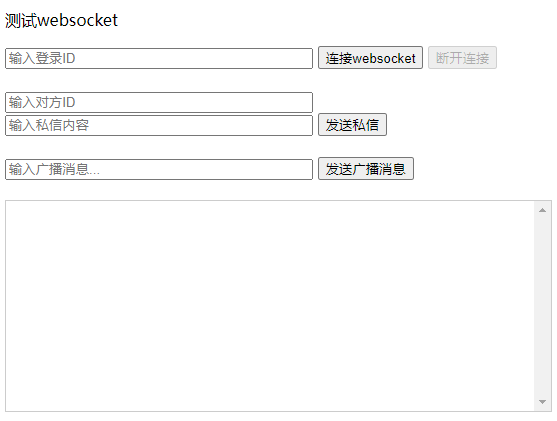
测试一下。 分别测试用户在连接服务器后(上线),分别进行群发,私聊,以及下线的操作。


可以看出聊天需要的核心功能都已经实现。前端只需要通过ID获取到用户信息,即可完成一个聊天室模块。
四、拓展性
上面只是讲了最基础的聊天实现,对于一些复杂场景,比如:可以通过后台直接推送广播消息、通过后台对某个ID用户单聊、上传文件,设置已读未读状态。也是可以实现的。
4.1 后台直接推送消息
/**
 * ChatController
 * @author https://lzyz.fun/
 */
@Slf4j
@RestController
@RequestMapping("/chat2")
public class ChatController {

    @Resource
    private WebSocketServer webSocketServer;


    @ApiOperation(value="获取所有在线用户")
    @GetMapping("/online-users")
    public R onlineUsers(
            @ApiParam(name="requestId", value="请求用户ID", required = true)
            @RequestParam("requestId") Integer requestId) {
        ConcurrentHashMap<Integer, Session> sessionPools = WebSocketServer.getSessionPools();
        Iterator<Integer> it = sessionPools.keySet().iterator();
        Set<Integer> idSet = new HashSet<Integer>();
        while (it.hasNext()) {
            Integer entry = it.next();
            if (!entry.equals(requestId))
                idSet.add(entry);
        }
        return R.ok(idSet);
    }


    /**
     * 系统主动群发
     * @param msg
     * @return
     */
    @ApiOperation(value="系统主动群发消息")
    @GetMapping("/to-all")
    public void toAll(@ApiParam(name="msg", value="消息", required = true)
                      @RequestParam(value = "msg") String msg ) {
        log.info("群发消息:{}", msg);
        ChatMessage out = new ChatMessage(1, msg, -999 );
        String json = JSONUtil.toJsonStr(out);
        webSocketServer.broadcast(json);
    }


    /**
     * 系统主动单发
     * @param userId  userId
     * @param msg msg
     * @return
     */
    @GetMapping("/to-user")
    public void toUser(Integer userId, String msg) {
        log.info("点对点。 {} --> {}  ", userId, msg);
        new ChatMessage(-999, msg, userId );
        webSocketServer.sendInfo(userId, new ChatMessage(-999, msg, userId ));
    }


}
这个可以直接通过编写一个controller来实现。通过注入WebSocketServer来实现后台系统对用户的群发和私发。
这样,就可以直接通过调用接口/chat2/to-all来实现群发消息了。 单发同样的道理。
4.2 对话时添加媒体文件
在对话时添加媒体文件,只需要对前端开放一个文件上传的接口。
具体的逻辑为,在前端的聊天代码实现中,若出现用户选择发送媒体文件(图片、视频、音频等),前端通过此接口将文件传输至后台专门存储媒体文件的服务器中,同时在数据库记录此媒体文件对应的聊天ID。 这样在后期展示历史记录时,即可将此媒体文件匹配至对应的聊天语句。
对于后端实现则比较简单,添加一个接口就好:
/**
 * FileUploadController
 * @author https://lzyz.fun/
 */
@Slf4j
@RestController
@RequestMapping("/up")
@Api(value = "文件上传", tags = "文件上传")
public class FileUploadController {

    @Value("${file.storage.location}")
    private String path; // 文件存储位置

    /**
     * 文件上传
     * @param file fileUpload
     * @param chatId chatId
     * @return JSONObject
     */
    @ApiOperation(value="将某句对话中的媒体文件上传至后台,返回文件路径。")
    @PostMapping("/upload")
    public ResponseEntity<?> uploadFile(
            @ApiParam(name="file", value="媒体文件", required = true)
            @RequestParam("file") MultipartFile file,
            @ApiParam(name="chatId", value="对话ID", required = true)
            @RequestParam("chatId") String chatId) {
        try {
            String fileName = this.storeFile(file);
            HashMap<String, String> res = new HashMap<>();
            res.put("fileName", fileName);
            res.put("chatId", chatId);
            return ResponseEntity.ok(JSONUtil.toJsonStr(res));
        } catch (Exception e) {
            log.error(e.getMessage());
            return new ResponseEntity<>(file.getOriginalFilename() + "上传失败!", HttpStatus.INTERNAL_SERVER_ERROR);
        }
    }

    public String storeFile(MultipartFile file) throws IOException {
        Path rootLocation = Paths.get(path);
        // 生成 UUID 以确保文件名的唯一性
        String extension = FileUtil.extName(file.getOriginalFilename());
        String uniqueFileName = UUID.randomUUID().toString() + "." + extension;
        Path targetLocation = rootLocation.resolve(uniqueFileName);
        // 将文件写入目标位置
        FileUtil.writeFromStream(file.getInputStream(), targetLocation.toFile());
        return targetLocation.toString();


    }


}
4.3 异步存储聊天消息以持久化
添加一个service内置存储消息的方法,方法参数包含聊天内容对象即可,使用@Async注解,这样就可以不影响前端反应的同时,将消息异步存储至数据库。例如:
@Service
public class MessageSaveService {

    @Async
    public void storeMessage(ChatMessage message) {

        // 这里应包含将消息保存到数据库的逻辑
    }
}
多说一嘴,如果你的用户量大,消息很多且文本量大。那么需要自定义SpringBoot的线程池来做消息异步存储。 否则可能会OOM哦。
4.4 已读、未读功能
这个看起来复杂,其实相当简单,因为我这边没有这个需求所以没实现。但是可以提供思路。
文章开头的ChatMessage对象内,存在一个readStatus字段,这个字段就是用来控制前端显示已读未读的关键,在前端实现中,以Vue举例,可以通过钩子函数判断用户界面是否展示了当前最新的或者需要改变未读状态的消息。 一旦判断为true,则这条消息已读,而此时不需要通知后台消息已读(减少接口请求以提高界面反应),前端把对应状态改好即可,待用户回复或者直接关闭时,在将此ID的状态通知后台即可。
到这里一个基本的聊天功能就实现完成了,当然可以基于这个框架继续完善和扩充其他功能如接入视频或音频SDK,优化网络协议甚至创建你自己协议,总之其可扩展性很强。
感谢阅读。


这篇文章写得深入浅出,让我这个小白也看懂了!
好家伙,是怎么做到页面给人感觉又新又旧的(这个代码展示区域好原生的感觉):joy:
这是超级古早的代码插件。,暂时顾不上换,迁移老服务器的数据快迁死我了:head_bandage:
同为Java开发,前来观摩
:high_brightness: 好耶 欢迎